![OPI_with_Tag_RGB_300dpi_3in_tall-1.png]](https://knowledge.opisystems.com/hs-fs/hubfs/OPI_with_Tag_RGB_300dpi_3in_tall-1.png?height=50&name=OPI_with_Tag_RGB_300dpi_3in_tall-1.png)
Table of Contents
Create an Account
Step 1
Go to https://managegrain.com/sign-in

Step 2
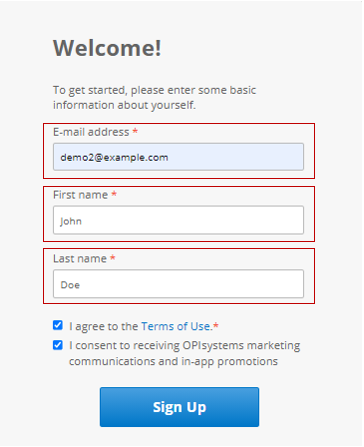
Enter the Email Address and First Name and Last Name you want to use into the appropriate field.
Note: Any field marked with a * is a required field.
Place a check into the box accordingly at the bottom and click the “Sign Up” button.
Step 3
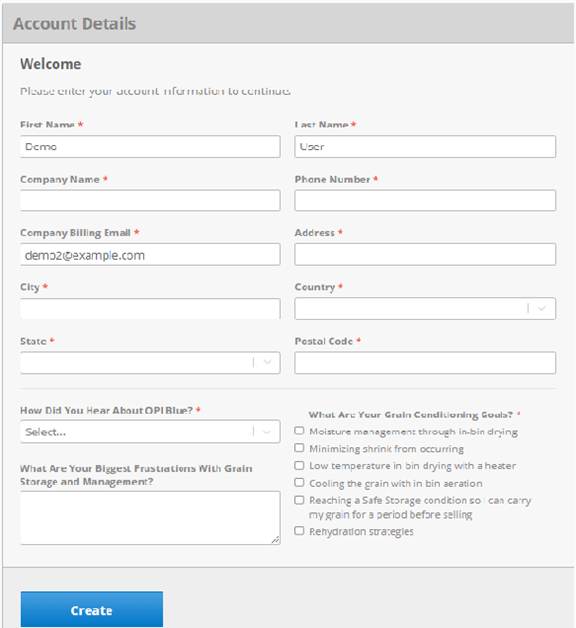
Fill in all the pertinent Account Details.
Note: Any field marked with a * is a mandatory field that must be filled in.
Step 4
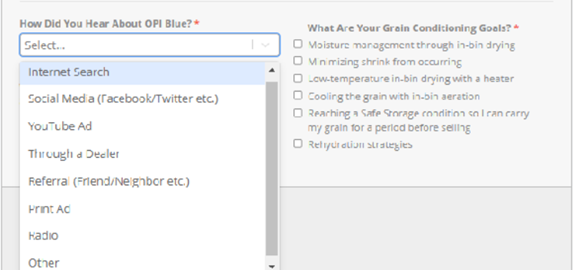
Using the dropdown and pick list, fill in the required feedback questions at the bottom of the account details, then click the “Create” button.
Note: These questions are only required during the account setup portion.
Create a Site
Step 5
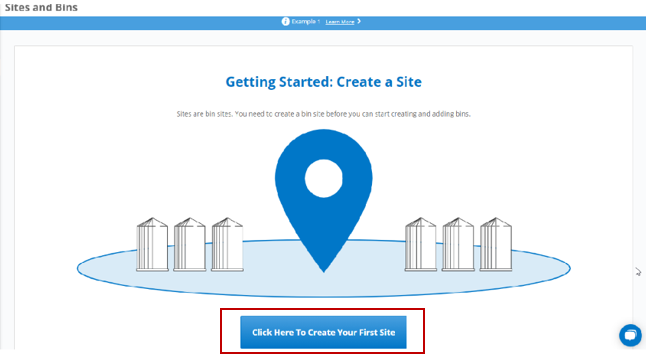
Click on the “Create Your First Site” button to add a site.
Step 6
Enter a site name in the Name field.
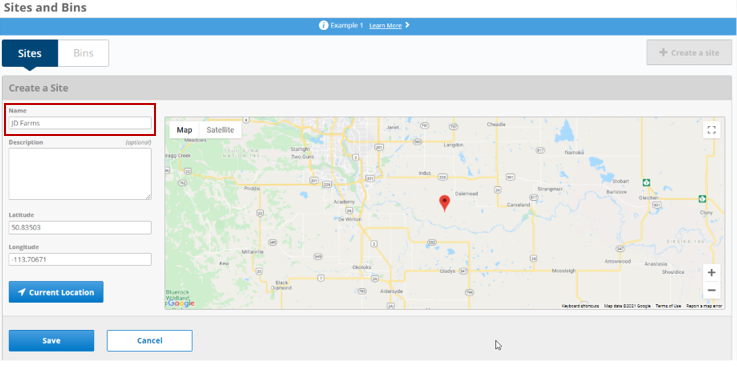
Step 7
There are three options when it comes to adding the location of the site.
- Manually enter the Longitude & Latitude (If known)
- Click the Current Location button (This will add the Longitude & Latitude as determined for the location of the computer or device being used to setup the site.)
- Use your cursor to drag and drop the red pin indicator on the map to the desired location.
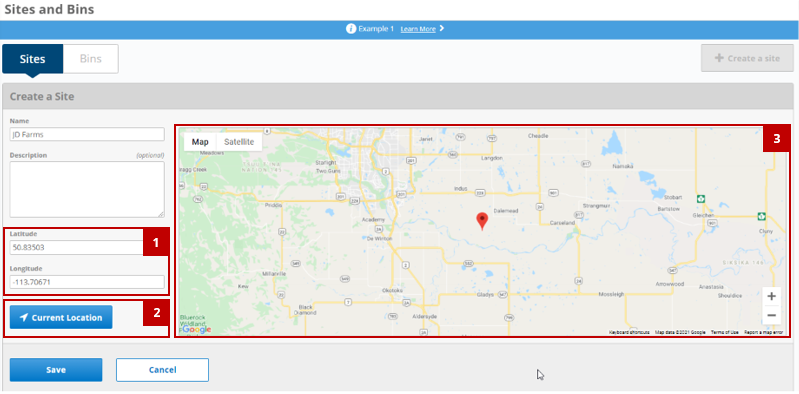
Click the “Save” button once to have completed.
Create a Bin
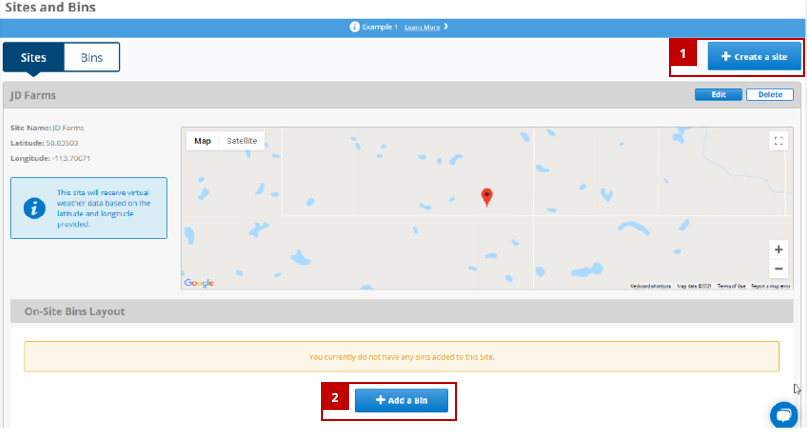
Step 8
There are two options once you have added a site.
- If there are more than one site and you need to add additional sites, click on the “Create a Site” button in the top right corner. (Repeat previous step to add additional site(s)).
- If you have finished adding sites, you can click on the “Add a Bin” button at the bottom of the screen to start adding bins/silos to your site(s).
Step 9
There are three sections within the bin details to be filled out.
- Fill in the bin details.
- Fill in the bin dimensions. (Diameter, Eave Height & Peak Height)
- Fill in the fan details. (Type, Horsepower & Make/Model)
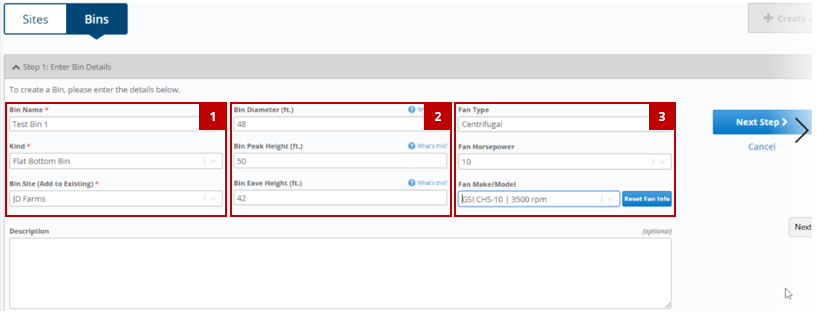
Click the "Next Step" button to continue filling out all pertinent information.
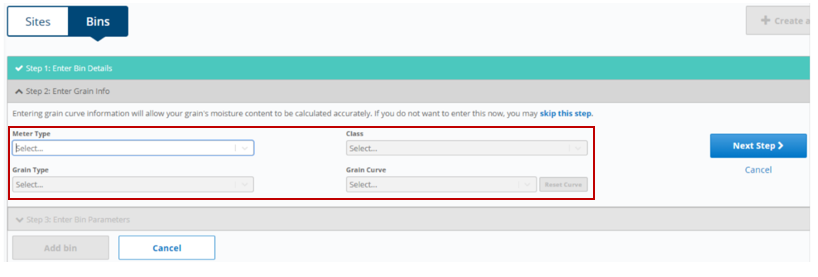
Step 10
Fill in the Grain Info by selecting the Meter Type, & Grain Type.
Note: Once the grain type is selected the Grain Curve will automatically populate with the most current grain curve. Also, if you do not know the commodity that will be stored at the time of the bin creation, you can click “Skip this Step” and fill the information in later.
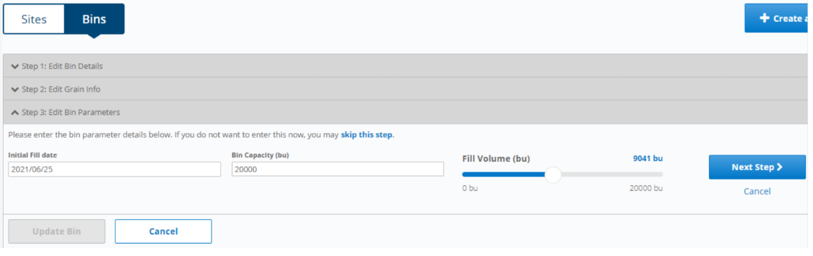
Step 11
Note: If you have skipped the pervious step because you do not know the commodity to be stored in this bin at this time, you may also skip the Edit Bin Parameters step and fill it in later. However, if you know the Fill Date, Bin Capacity and Fill Volume then complete the information and click "Next Step".
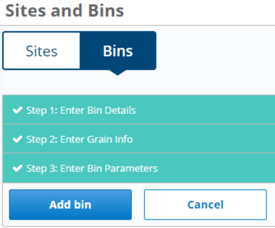
Step 12
Once you have completed the Bin Details, Grain Info, and Bin Parameters click the “Add Bin” button to finish the task.
Step 13
After your bin have been created successfully, you will have the option to Create/View Bins as needed or go to the Bin Data page.

Monitor Your Bins
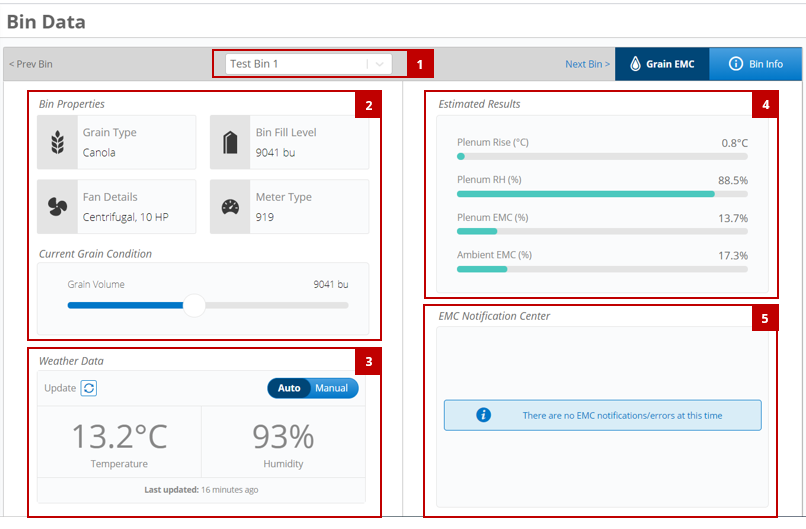
Step 14
The Bin Data page is where you would select the desired bin to have the EMC value calculated.
- Select your desired bin.
- This section displays all the grain, fan, and the fill level of the grain.
- By default, the virtual weather is turn ON. This will provide you with virtual weather (Temperature & Relative Humidity) for your bin site based on the closest virtual weather data.
- This section will display the output data using all the previously inputted data and the virtual weather data.
Note: If you had skipped any steps during the bin creation stage, section 5 would display a message notifying you that there is missing information that needs to be added to get output values from the calculator. You would click on the displayed message in the Notification Center, and it would take you directly to the section that the information needs to be added.
Note: If you have added OPI hardware to your site, (i.e., Cables, Cable Nodes, Fan Nodes) you would click on the "Setup OPI System" button in the button left hand corner of the screen to continue the journey to configuring the installed hardware onsite.