![OPI_with_Tag_RGB_300dpi_3in_tall-1.png]](https://knowledge.opisystems.com/hs-fs/hubfs/OPI_with_Tag_RGB_300dpi_3in_tall-1.png?height=50&name=OPI_with_Tag_RGB_300dpi_3in_tall-1.png)
An OPI Blue system provides the ability for end use customers to grant member access to other people by using an email address to facilitate the process on www.managegrain.com. Adding members provides the flexibility and simplicity for dealers/installers to be able to support their customer base without the need to request a username and password from them.
This process was updated to support future
The following document outlines the steps that a customer must take in order to grant permission to another email (username) with www.managegrain.com website and how a dealer can view the account.
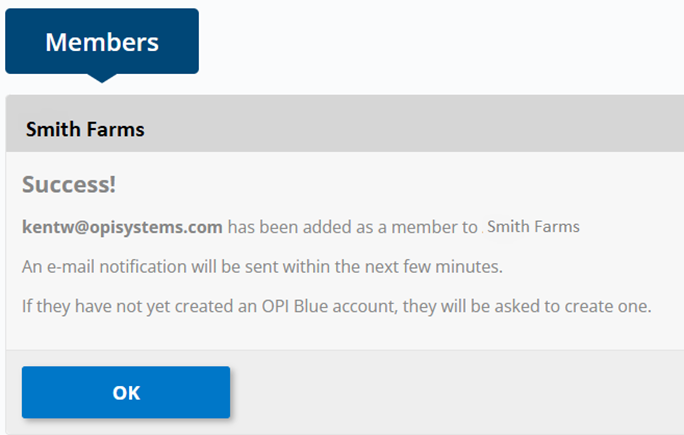
1. A Customer (End User) will be able to grant permissions to any registered email/username by selecting the Members section located in the menu.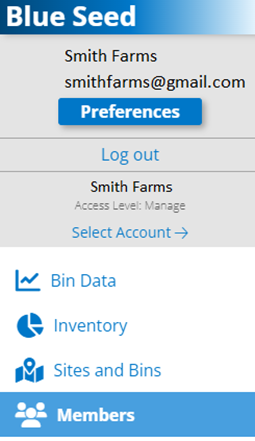
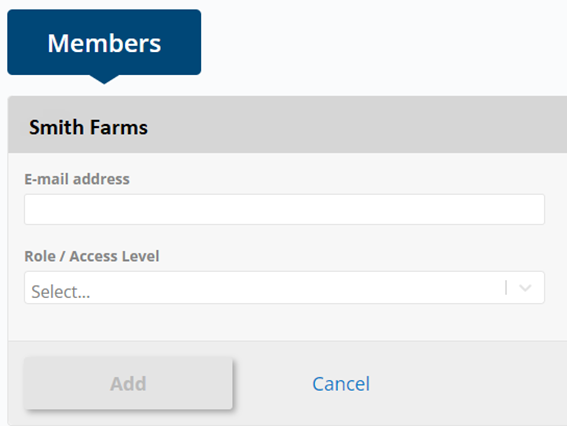
2. Click the Add Member button


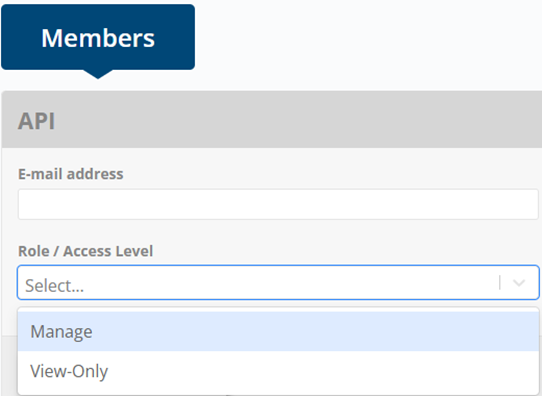
5. Use the drop-down menu to choose the desired role/access level for the member you are looking to add. Note: View-Only gives the member the full site access without the ability to change any information or settings and Manage gives full site access (except Account Details) with the ability to edit information and change setpoints.
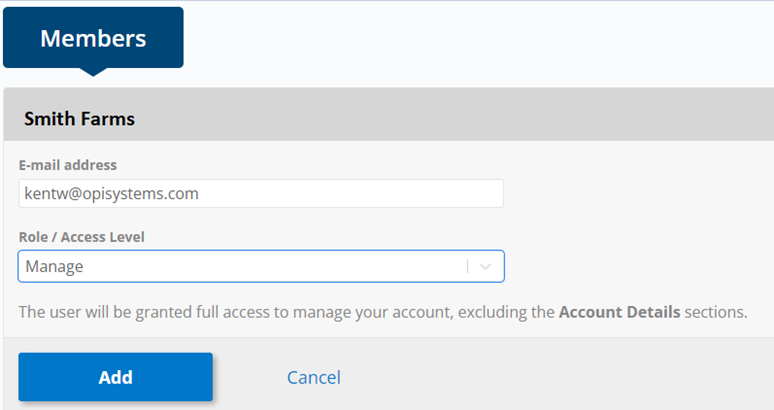
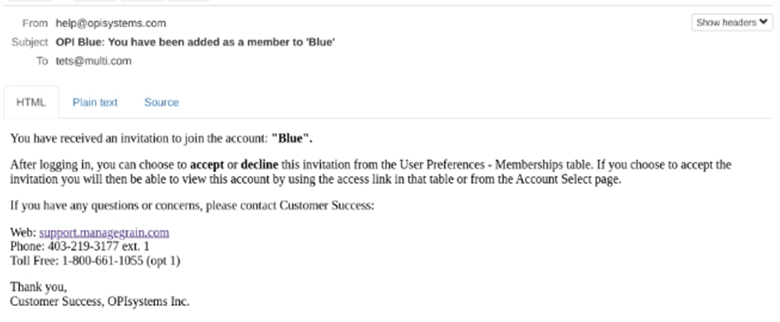
7. The member you are looking to grant access to your organization will receive an email notification.
Note: Example of the email notification the newly added member to an organization will receive.
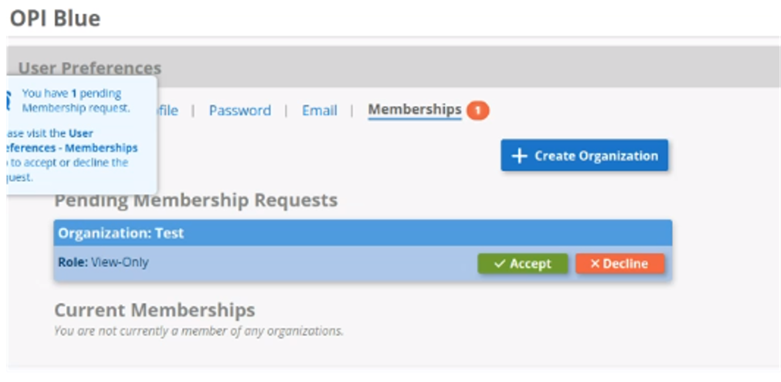
8. If you have been invited to be a member of an organization, you will also need to login and go to the Memberships section located under Preferences. From there you can accept or decline the invite.
How to Access your Customers’ System
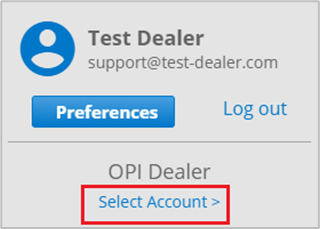
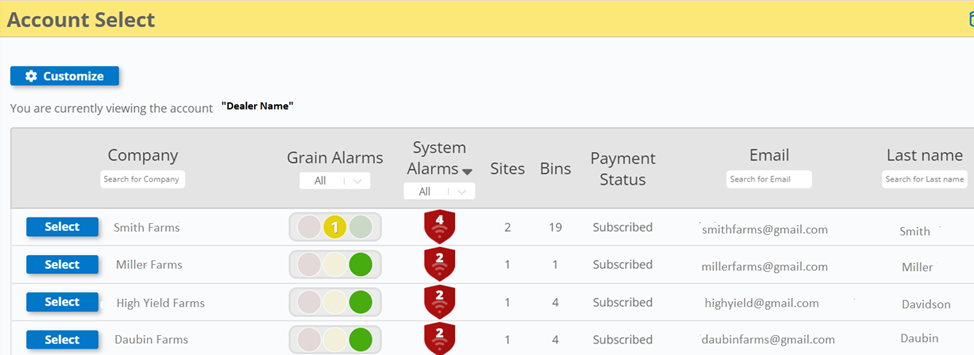
1. You have two options when it comes to accessing an account that you are a member. The first option is the standard means by clicking on Select Account located at the top of the menu on the left-hand side. All accounts in which you are a member will be listed on the Select Account page.
2. On the Select Account page, click on the Select button to access the desired account. Note: The accounts are listed by priority based on Active Grain Alarms, Acknowledged but Active Grain Alarms and Active System Alarms. This drives the accounts with active alarms to the top of the list with accounts with no active alarms moving further down the list.
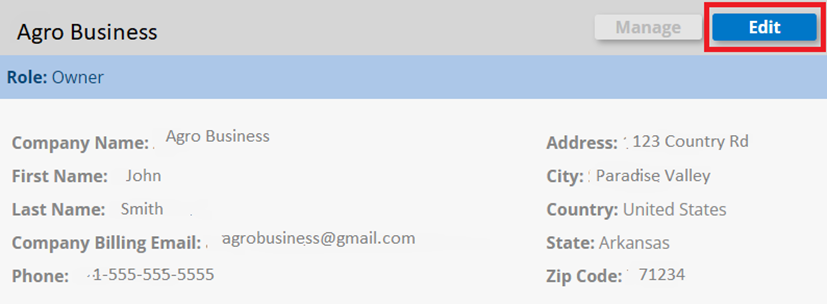
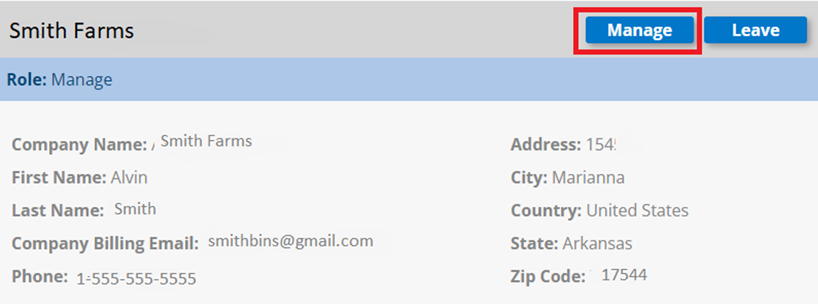
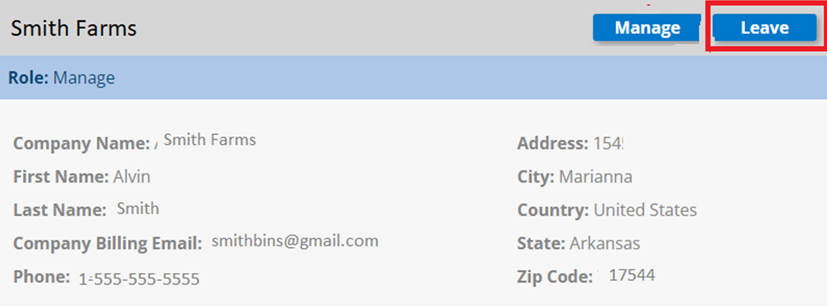
3. The second means to accessing any accounts that you have Member access will be shown in the Membership section under user You can click the Manage button to go directly to the desired site. Note: This section gives you the ability to Edit your organization information, Manage any account or Leave an account that you no longer need access to for support purposes.
Edit (Your own Organizational information)
Manage
Leave
Note:
The customer’s Account Details and Payments section from the menu will not be visible to anyone accessing another account when using permissions. This is to ensure the integrity of the account personal details and ensure they cannot be changed by anyone but the account holder themselves.
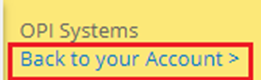
How to Exit your Customers’ System
1. When finished in the customer account, click Back to your Account located in the left-hand side of the top banner.
Best Practices
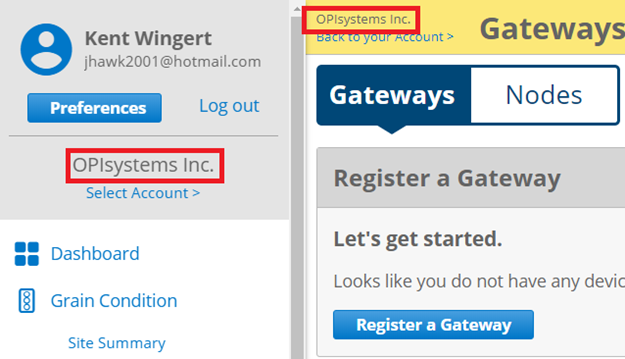
It is critical that you regularly verify which system you are in when you are making changes to a customer’s configuration. If you are switching between customers’ systems, it is easy to lose track and incorrectly apply changes to the wrong customer.
The account being accessed is always identified in two locations on the screen for verification.
Note:
Email addresses entered for Member’s access do not have a validation process at this time. It is important that the email address is entered accurately to ensure the correct account is granted permission. The account being granted permissions will receive an email notification that they have been granted Member access.