![OPI_with_Tag_RGB_300dpi_3in_tall-1.png]](https://knowledge.opisystems.com/hs-fs/hubfs/OPI_with_Tag_RGB_300dpi_3in_tall-1.png?height=50&name=OPI_with_Tag_RGB_300dpi_3in_tall-1.png)
Tools Required
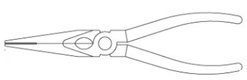
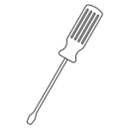
Fig. 1 Needle Nose Pliers Fig. 2 Small Flat Edge Screwdriver
Special Callouts
- Because the two pins used to keep the solar lid attached to EPIQ Cable Node base are hard to see fully once they are in place the two pictures below help to illustrate the compression needed with the Needle Nose Pliers in order to slide the two pins out so the lid can be removed.

Fig. 3 Hinge Pin Compressed & Pushed Horizontal for Removal
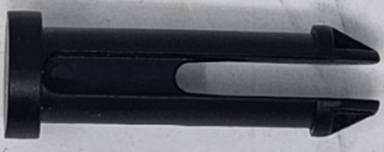
Fig. 4 Hinge Pin When Not Compressed & Back in Place
- The second important thing of note is that the two springs used on the lid hinge are under compression. It is important when removing the lid that a small bit of pressure is applied
 Fig. 5 Compressed Lid Springs
Step 1
Release the latch and open the lid to expose the solar panel termination. Prior to disconnecting the solar panel flip the solar switch to disable.
Fig. 6 Lift Open Latch
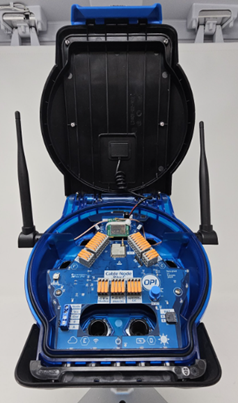
Fig. 7 Cable Node Lid Open
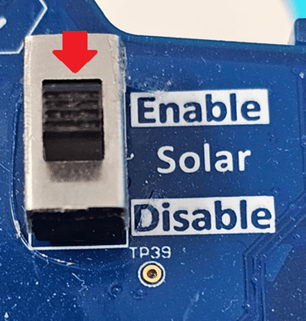
Fig. 8 Solar Switch to Disable
Step 2
With the flat edged screwdriver loosen the terminations and disconnect the red and black wire.
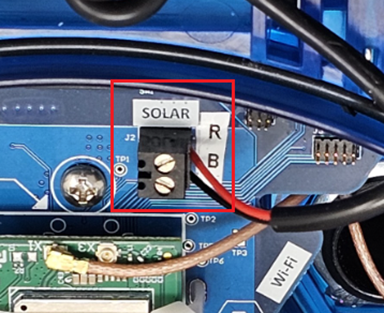
Fig. 9 Solar Panel Terminations

Fig. 10 Disconnect Solar
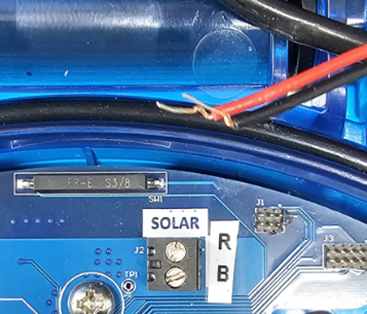
Fig. 11 Red & Black Solar Wires Disconnected
Step 3
Close the lid on the EPIQ Cable Node by securing the latch.
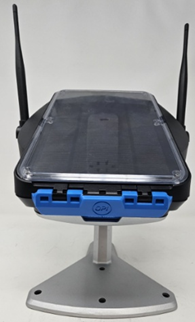
Fig. 12 Cable Node Closed
Step 4
Turn the EPIQ Cable Node over with the underside of the lid hinge placed closest to you.
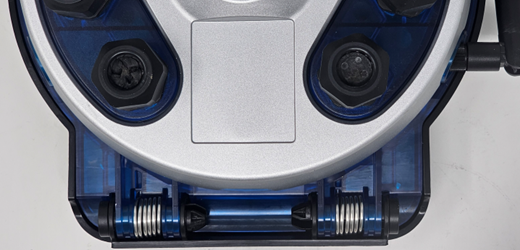
Fig. 13 Cable Node Underside Lid Hinge
Step 5
Using the Needle Nose Pliers pinch the end of the plastic pin to compress it and push the pin out of the hinge. Repeat the same process to remove the second pin from the opposite side of the hinge. Once both pins have been removed the lid can easily be removed from the main body of the Cable Node.
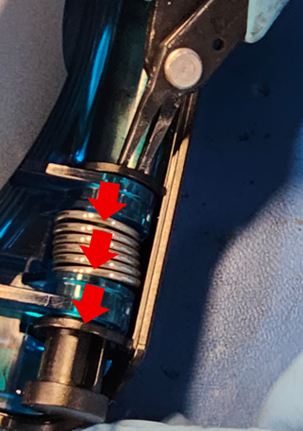
Fig. 14 Pin Removal from the Lid Hinge
Step 6
Take the replacement lid and solar panel and align the springs and the hinge. For best exposure ensure the Node is at a 90º angle with the hinge side exposed. This will provide the best visibility and access to align the openings on the lid and the base to push the hinge pins through to attach the lid.
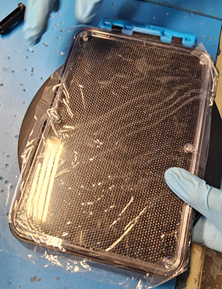
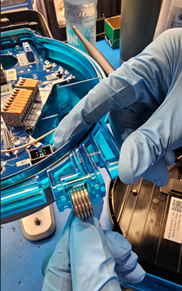
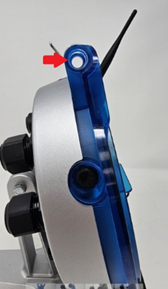
Fig. 15 New Lid with Solar Panel to be lined up
Step 7
If the spring has come out and needs to be put back in place. Seat the straight pointed end of the spring into the notch on the base as shown below.
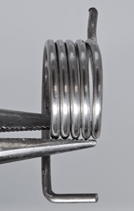

Fig. 16 Hinge Spring | Fig. 17 Notch on Base for Hinge Spring | Fig. 18 Pointed Portion of Spring Seated
Step 8
Take the first hinge pin and push it into place through the aligned openings on the lid and the base. There will be some resistance as the pin is compressed and pushed into place. Repeat with the second hinge pin full securing the lid into place.
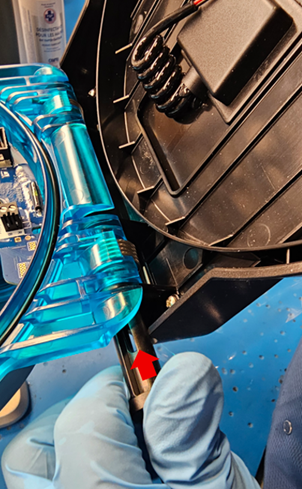
Fig. 19 Secure the replacement lid into place
Step 9
Once the lid is secured the solar panel connection can now be re-terminated. Note: Ensure the Red goes into the (R) and the Black (B) terminations. Use the small flat edged screwdriver to secure into place. Once terminated give a light tug on the wires to ensure they have been secured.
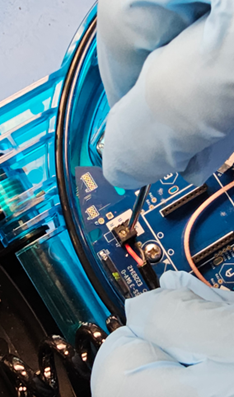
Fig. 20 Solar Wires Secured
Step 10
Return the solar switch back to the Enable position to resume charging of the battery. Close the Node as you are ready to resume normal operation.
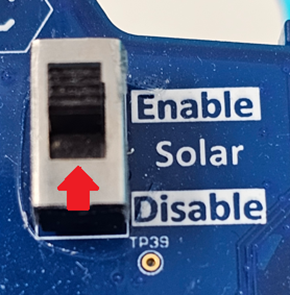
Fig. 21 Solar Switch Enable