![OPI_with_Tag_RGB_300dpi_3in_tall-1.png]](https://knowledge.opisystems.com/hs-fs/hubfs/OPI_with_Tag_RGB_300dpi_3in_tall-1.png?height=50&name=OPI_with_Tag_RGB_300dpi_3in_tall-1.png)
A Site Log is used to provide a record of the bins along with what hardware (like Gateways and Cable Nodes) is attached to each one. Each cable installed on each bin should be recorded on this sheet indicating its address and position on the Bin. This information is good reference material and will come in handy in the future should there be a need to troubleshoot any hardware or system issues.
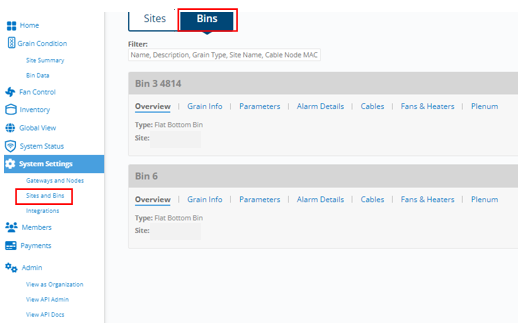
- In order to add cables to your Bin structure on OPI Blue, navigate to the Sites and Bin page by selecting it on the menu. Click on the Bins tab on the top of the page.
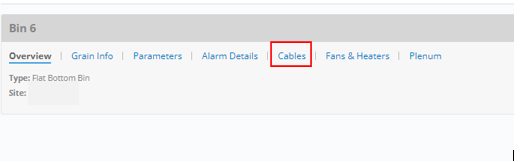
- Next, Click on the Cables tab on the respective Bin.
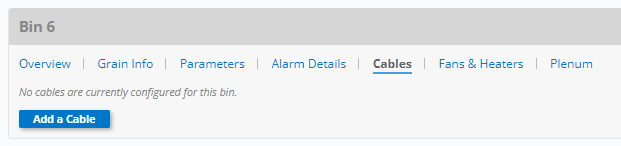
- Click Add a Cable.
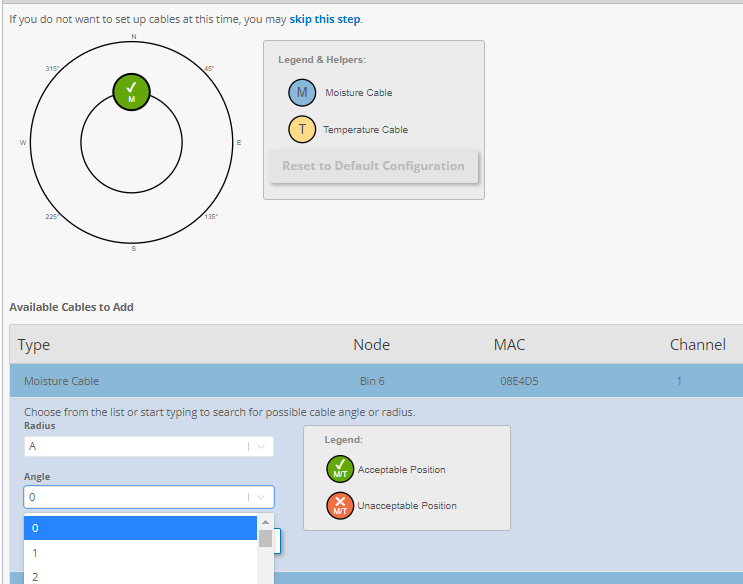
- To add each cable into the bin, tap
 at the end of the cable.
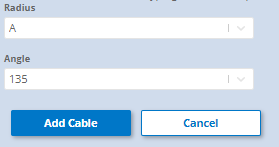
- Select the desired radius and angle for each cable based on the way they are configured in the physical bin. This information should also be recorded on the site map/log sheet.
- The cable will then move from the Available Cables to Add section to the Added Cables section and the added cable will appear inside the bin as shown below.
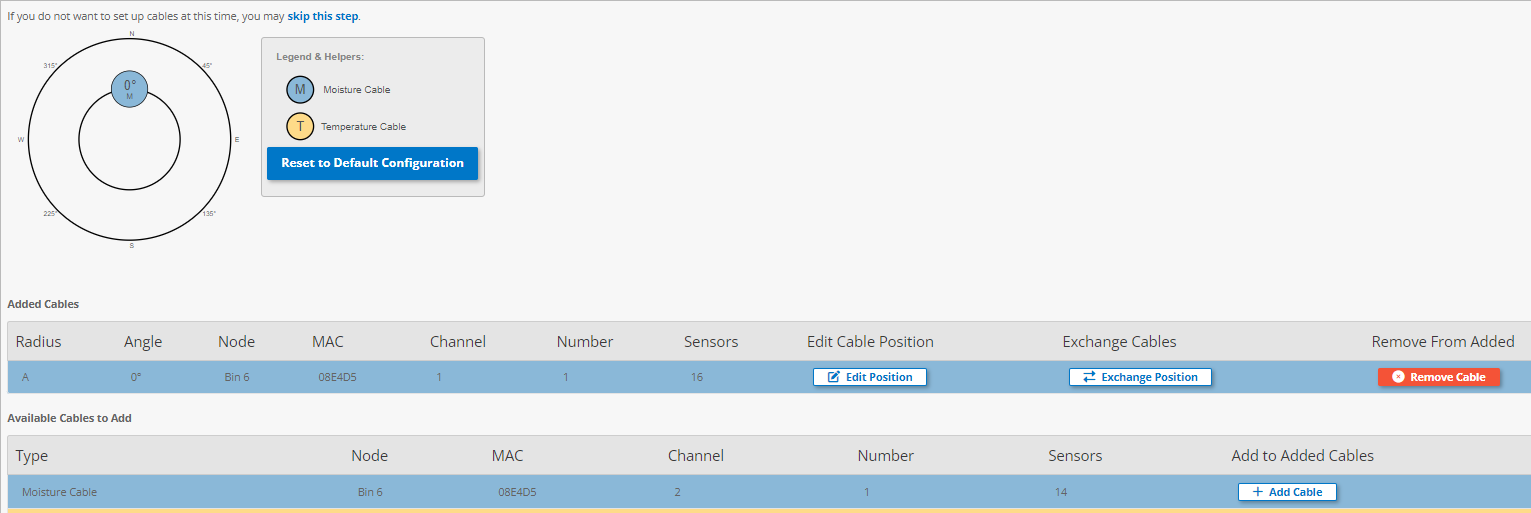
- Repeat the process to add more cables until all specified cables have been added to the
bin. - Once all the cables have been added click on Next Step
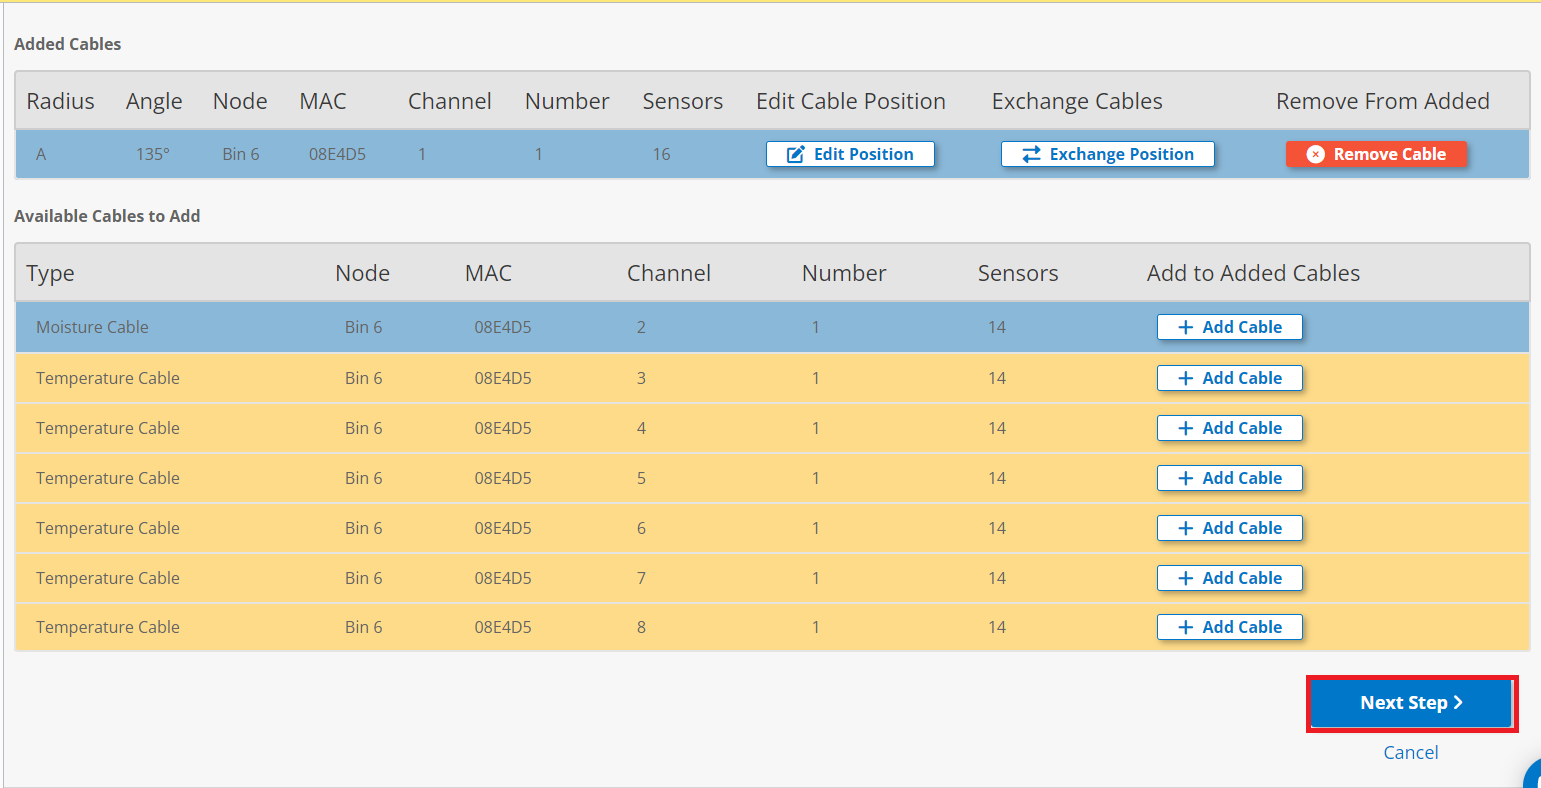
- Lastly you want to click on Update Bin to save the changes.

- If necessary, you can reposition the cables within the bin to ensure the
proper location. Tap Exchange Position button located at the end of a specified cable to start the relocation process. - When relocating cable(s) you can change the angle in which the cable has
been set, in addition to changing the radius in which the cable has been positioned.